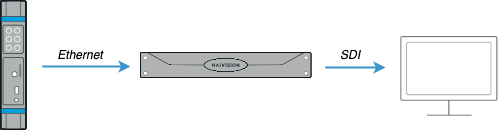
This is a demonstration of the fastest and simplest way to get a live stream running at your location. Your transmitter (Pro 360-5G or Pro 460) will generate and send a video pattern via an ethernet connection to your transceiver (StreamHub server), which will receive the video and display it on a monitor over an SDI connection. As with all Haivision products, the stream benefits from award-winning SST and SRT technologies, which ensure maximum quality, reliability, and security.
Note
For this demo you will need a monitor capable of displaying an SDI signal.
Here's all you need to do:
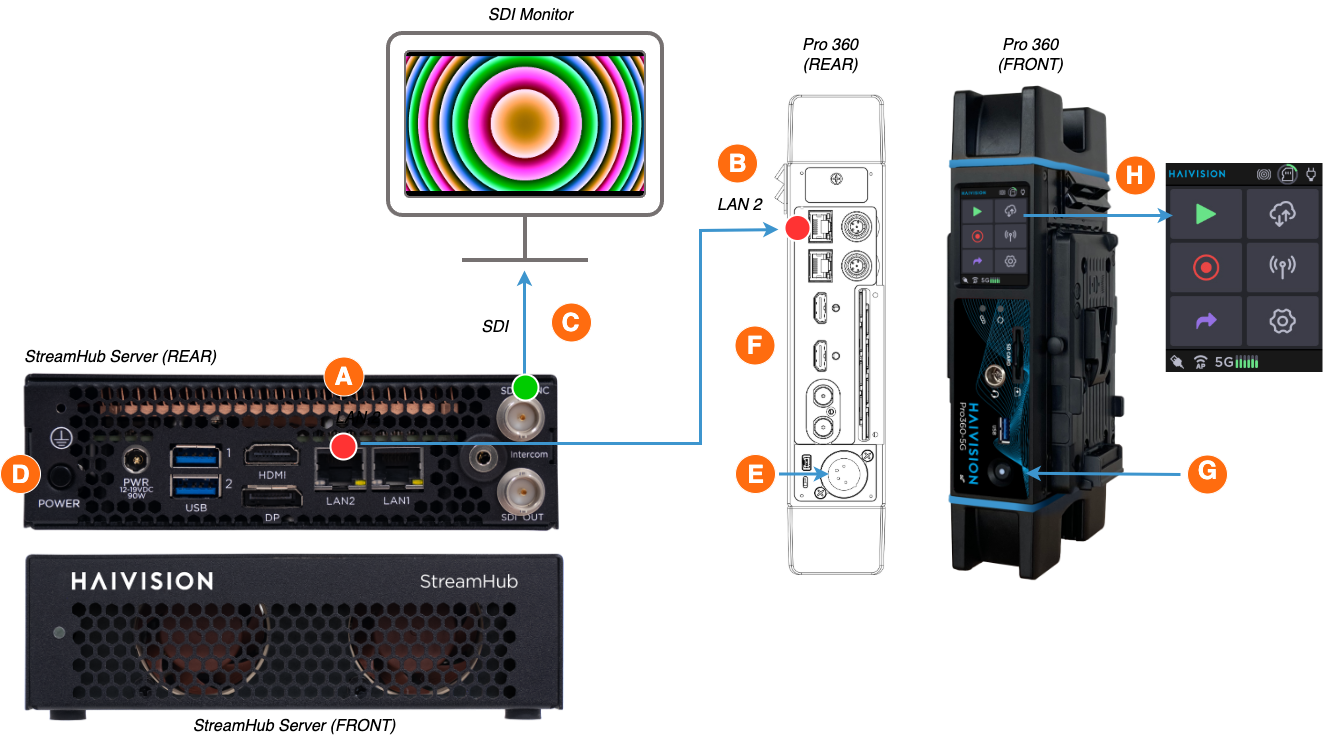
Kit with Pro 360-5G Transmitter
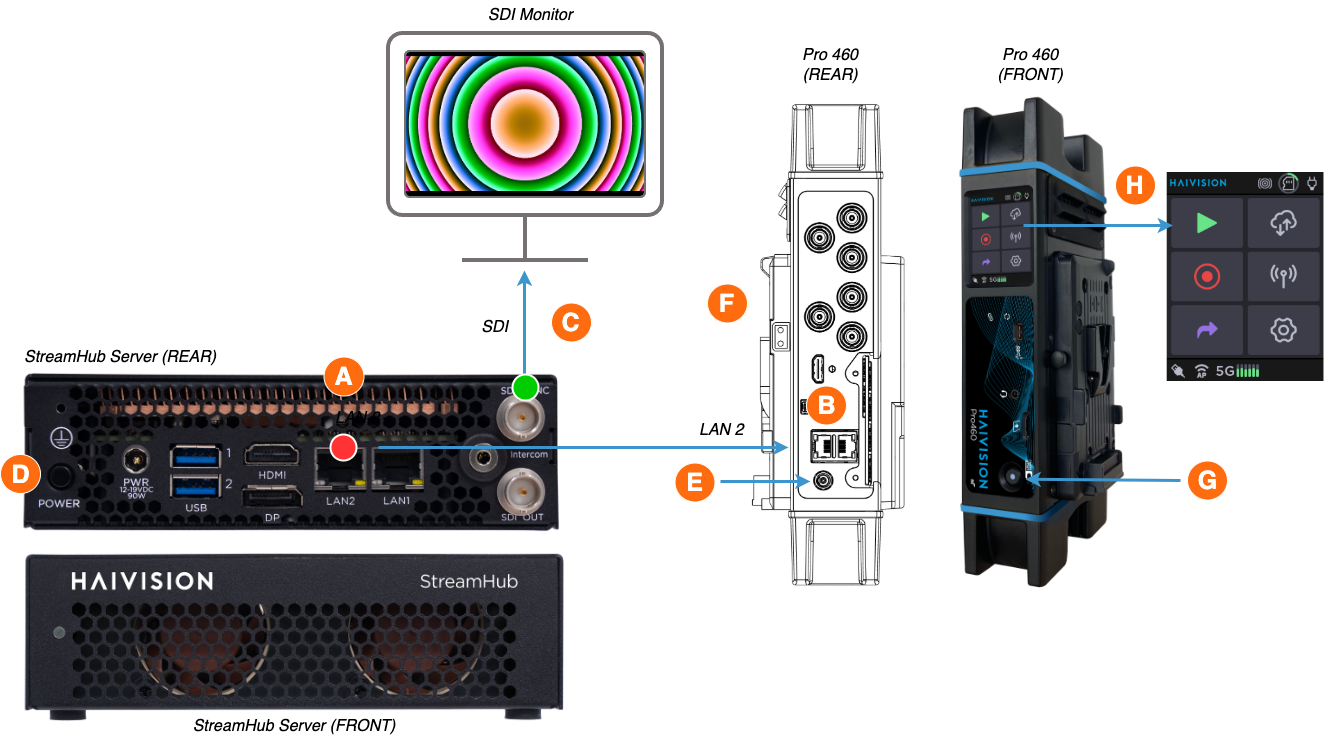
Kit with Pro 460 Transmitter
Connect LAN 2 on the StreamHub server to LAN 2 on the transmitter (both have RED dust caps) using the ethernet cable provided in your kit.
Connect the StreamHub SDI 1 output (GREEN dust cap) to your display/monitor using the SDI cable provided in your kit.
Connect the power cable to the StreamHub and press the power button to turn it on. Wait 3 minutes for the server to complete its startup sequence.
The transmitter is shipped with a fully-charged battery , but you can also connect the power adapter provided.
Press the transmitter's power button to turn it on. Wait about a minute for the unit to complete its startup sequence.
Configure the destination profile to Local StreamHub:
On the front panel tap .
Tap and then tap .
Tap until the Local StreamHub profile is displayed, and then tap the symbol to select it. A green dot confirms the selection.
Press the Go live button . The transmitter generates a dynamic pattern of coloured circles as a video stream and sends it to the StreamHub server, which relays the stream to your display/monitor.
And that's it! You've successfully streamed a live video from your location to a local monitor via an internal ethernet connection, entirely on premises!
Important
When you're finished, stop the live stream on the transmitterby doing the following:
On the live preview screen, tap .
Tap , and then tap STOP LIVE .
Turn the transmitter off by applying a long press to the power button (see Returning the Eval Kit).
More to Explore
If you'd like to push this demo a little further, here is something you can try:
Instead of using the coloured circle stream, you can connect a live SDI source (GREEN dust cap) to the transmitter and change the source selection to test the workflow with real-life content.
Click here for details...
Changing the video input settings on the transmitter
By default, the transmitter is configured to deliver an internal coloured circles pattern. To switch from the pattern to an SDI input, do the following:
From the Home menu, tap > to get to the Video Source screen.
Press Video Source (in this case it should be Pattern). Select SDI 1 (tap and to scroll up or down, if necessary).
Press to return to the Settings menu.
Press and then select Live H264.
You will see a preview of the live stream on the front panel screen (after a short period, the screen locks and displays the message "Operation in progress").
Note
In this configuration, latency is optimal because of the use of an ethernet connection rather than a cellular bonded one.
Digging Deeper
For more detailed instructions on how to operate and administer the products in this demo, please refer to the following:
 to LAN 2 on the transmitter
  (both have RED dust caps) using the ethernet cable provided in your kit.
 using the SDI cable provided in your kit.
  and press the power button to turn it on. Wait 3 minutes for the server to complete its startup sequence.

 to turn it on. Wait about a minute for the unit to complete its startup sequence.
 .
. and then tap
  .
. until the Local StreamHub profile is displayed, and then tap the
  symbol to select it. A green dot
  confirms the selection.
 Go live button . The transmitter generates a dynamic pattern of coloured circles as a video stream and sends it to the StreamHub server, which relays the stream to your display/monitor.
 , and then tap STOP LIVE .
 >
>  to get to the Video Source screen.
 and
and  to return to the Settings menu.