Connecting the Device
Open the box, verify the contents, and visually inspect the items for any shipping damage. If necessary, contact Haivision for return instructions.
Unpack the box and position the hardware on a stable work surface. Optionally, mount it on a wall, under a desk, or on the back of a monitor.
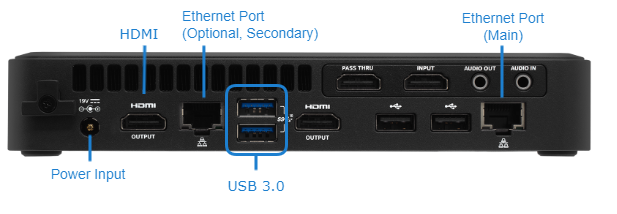
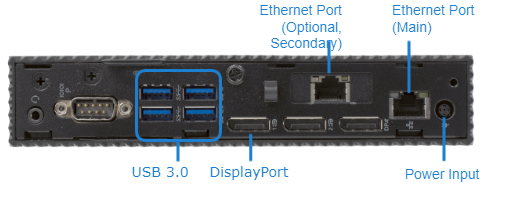
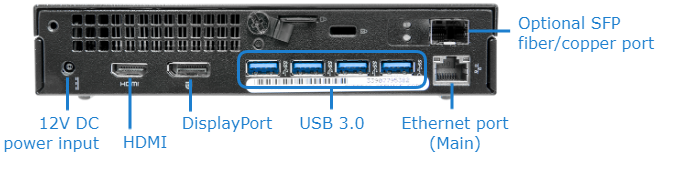
On the back of the device:
Connect to your network using an Ethernet cable to the main Ethernet port.
For initial setup purposes, attach a mouse and keyboard to the available USB ports, and monitor to the DisplayPort (Gen 1 or 2 versions only) or HDMI (Gen 1 or 3 versions only) ports.
(Optional, Gen 2 or 3 versions only) For a second NIC, connect to your network using an Ethernet cable on the secondary Ethernet port.
(Optional, Gen 1 version only) Connect the Fiber SFP module for the second NIC.
Tip
To remove the Fiber SFP module, rotate the latch and unplug it from its slot.
Attach the included power cord to the power receptacle and plug the other end into a power outlet.
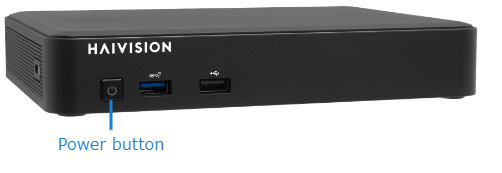
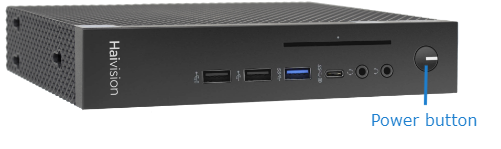
On the front of the device, press the Power button to power it on. The power LED lights.