Scanning for a Wireless Network
To scan for a wireless network from the Unit Panel or from the Web Interface, see the tabs below.
From the Home screen, tap
 until you reach the Networks screen.
Tap
 to scroll down and tap Mode to select Client, if not already selected.
Tap the Network line to scan surrounding networks.
A list of detected networks appears.Tap
or to scroll down.Tap the network name to select it.
Enter the password and tap
 to confirm.
On the Dashboard in the Networks section, click the
 icon in the Wi-Fi entry.
In the Mode section, if not selected, select Client.
Click the Apply button.
Click the Wi-Fi line to expand it.
Click the Scan button.
Surrounded networks are scanned and listed.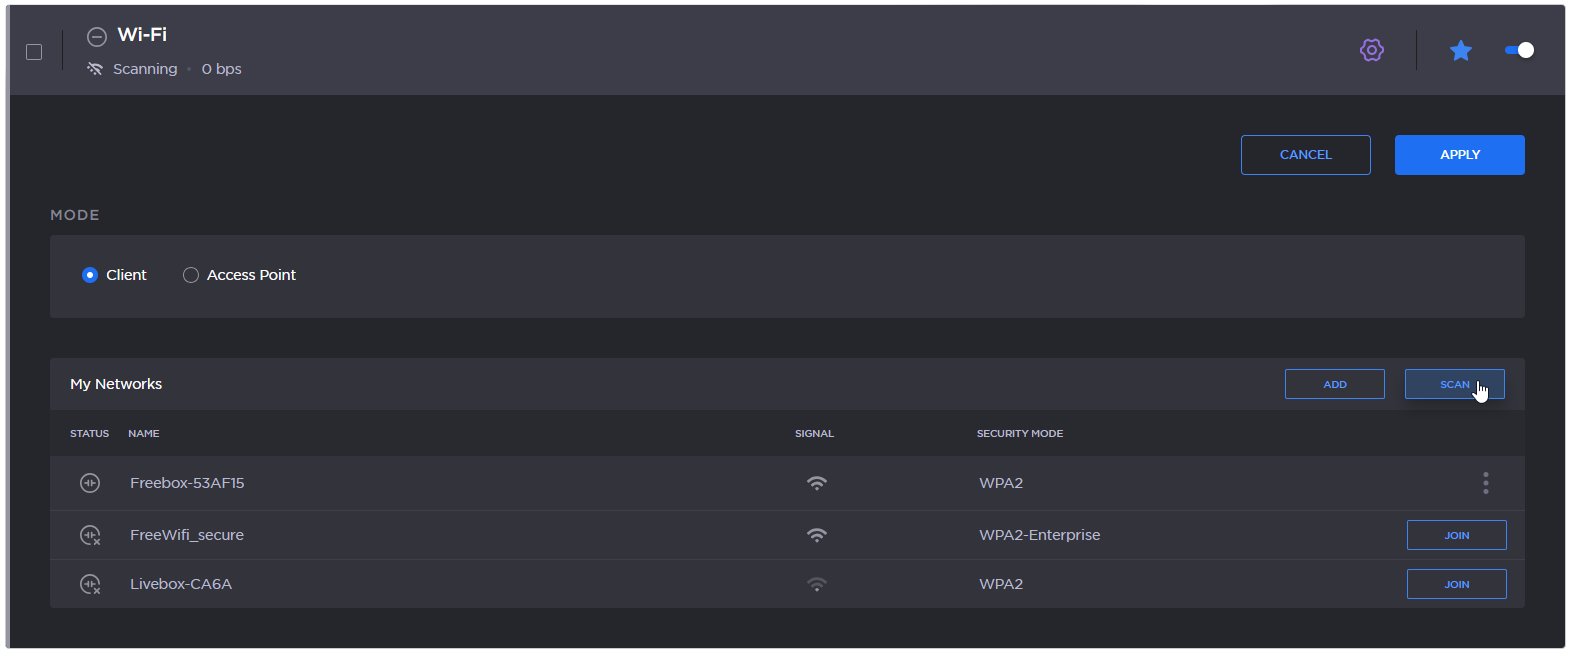
WiFi networks scan results
Select the desired network among the list by clicking the Join button.
Enter the password and click the Join button.
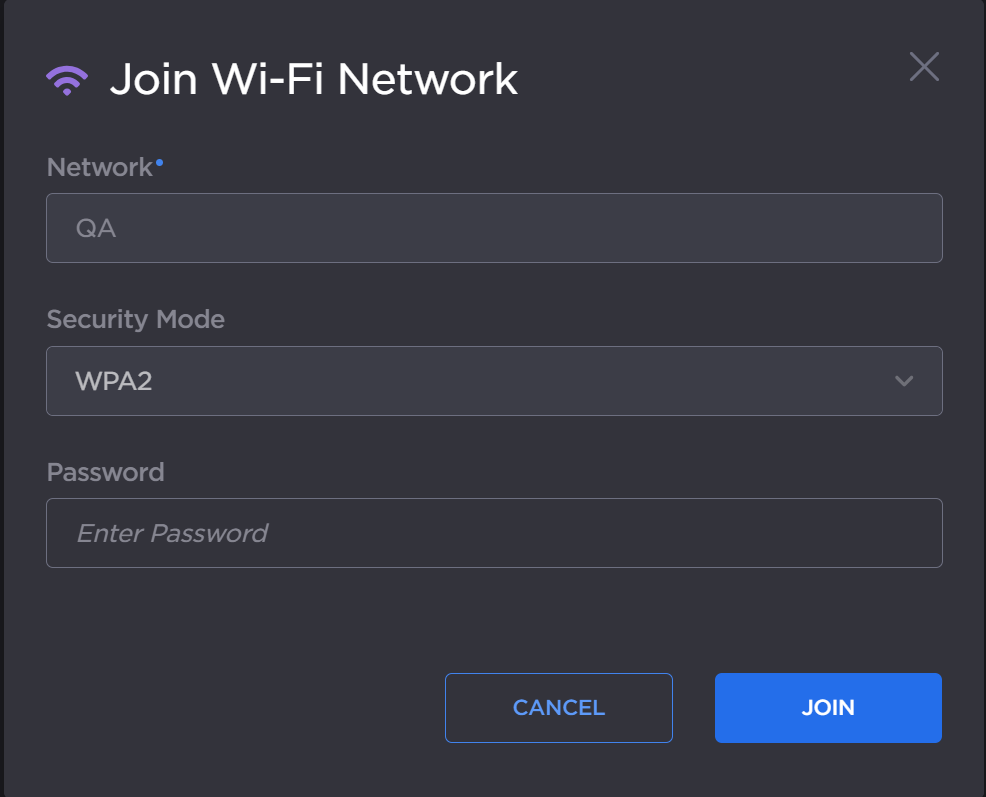
After successfully joining the network, the connection status appears in the Wi-Fi network entry.

Wifi Connected